Saturday, July 23, 2016

August do.good stitches

I'm in charge of picking the block for our August do.good stitches quilting bee. Sewing and quilting with my nurture circle ladies is one of the highlights of my month. 

This month we're tackling some simple paper piecing kaleidoscope blocks. The tutorial for this month is found here: 


For the blocks, I'm asking the circle to use low volume prints for the outer corners and ROYGBIV solids for the spokes (see the examples below). In the instructions, it says to join four of the finished blocks into a 12" block. You can skip that step and just make 8 different blocks and send them to me. Try to use a variety of solids and not make 8 red blocks. 


A couple tips that helped me when making these blocks. 

I chain pieced my blocks and just did the same step 8 times. It made trimming, sewing, pressing, etc. go so much faster. 


I noticed when trimming my blocks before the final piecing step (sewing the halves together) that the outer line is just a bit wider than 1/4". Make sure the seam allowance is truly 1/4" before seeing the two halves together. 
When piecing the halves together, make sure you leave a 1/4" "notch" at the top and bottom of each block. This ensures that the center points line up. 

Leave the papers in. I'll take them out once I piece the blocks together. 

The blocks do take some time to put together, but the paper piecing is pretty easy. Have fun! 

Briawna 


Friday, July 22, 2016

Fabric Friday!

Because sharing my love of fabric makes me feel a little better about hoarding it, I'm starting this series of Friday Fabric Fix with you lovelies. Whether you just like color or love working with fabric, I hope you love these fabric lines as much as I do. 

Also, I'm trying to be more conscientious with my fabric purchases and that means I won't be sharing every Friday. But I'm sharing fabric I think is versatile and covers a wide range of uses-from pouches to quilts to appliqué to garment sewing. Let me know if you have any lines that I HAVE to check out. 

This week's fabric Friday is Janine Vangool's first line for Windham fabrics. Like her magazine, the line is called Uppercase. And I LOVE it! 


I mean, look at this line. I'm a sucker for basic blender fabrics and this line fits the bill perfectly. It's got a great range of color and small prints for those tiny projects. 


My nine year old pulled out these butterfly florals and immediately asked if I could buy more to make her a dress. She gets me. She really gets me. 


These darker Perforated prints just make the perfect dramatic dot for applique. When I started pulling fabric for my Smitten EPP quilt, these were some of the first fabrics I pulled. They're dark and moody, but a lovely contrast for some of the lighter fabrics.  


The Dotty prints just make me happy because...well, dots!


I love these Tweed prints as a great directional print because they're not stripes. I like stripes and they play well with others, but I really like how these are directional without being overbearing. 


The Waffle prints are just happy, light fabrics that play very well with others. They would be beautifully matched with pretty much any themed fabric.


The Knitted fabrics make me think of bubbles, which is perfect for pretty much any project! Right? 


When my six year old saw these Ice Florals, she immediately asked for dresses in "every color". They're bright and fun without being overly dramatic. Like me. Ha!


Confession time: I initially bought this bundle because, though I loved all the blender fabrics and potential for all of the fabrics, I NEEDED these All Caps prints. Yes, I'm a total nerd (aka, junior high English teacher and general bibliophile) and all things text are my love language. That's absolutely one of the categories, isn't it? I can these making their way into lots of projects in the near future. 


That's it for the the first Friday Fabric Fix. If there are lines I have to check out in the near future, let me know! What would you make with this line? 

Briawna
@purplepoppyquilts

#Fridayfabricfix

#Purplepoppyquilts


Saturday, June 11, 2016

Stars and Stripes

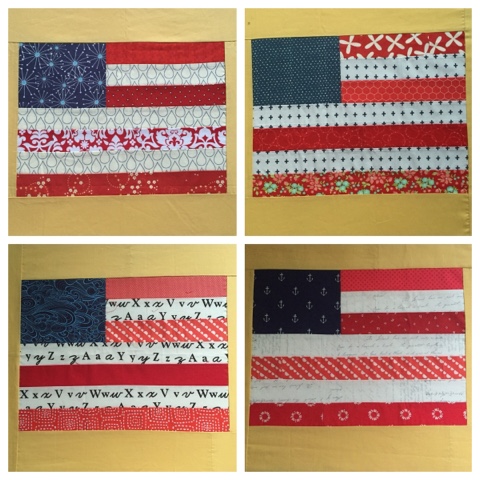
When I saw Camille's Stars and Stripes quilt, I knew I had to make one. And I knew that it had to be scrappy. Little did I realize how scrappy it would end up being! 


I pulled fabric, knowing I'd do the "stars" and red stripes scrappy because, well, I have enough scraps to make at least a dozen of these quilts. But I was torn on whether to go fully scrappy and include a variety of low volume prints or to stick with white. In the end, my scrappy heart won out...with a compromise. I did each block with a different low volume print. 
Some of my favorite blocks.

This was such a fast and easy quilt to piece. Once I'd cut the fabric, it only took about an hour to piece the top. 

 Basting:my least favorite step...though it did force me to sweep and mop my kitchen floor so...

I had a couple hours yesterday while my youngest son napped (whom I lovingly refer to as the threenager). Would you believe I ran out of thread with this much left to quilt? 

This morning dawned wet, cold and gloomy (yes, It's June in Seattle). So after the gym, I stopped at the quilt shop to grab more fabric, I mean thread. 

It quite literally took 3 minutes to finish quilting. 

Tula Pink Freefall in lipstick. This fabric is so light and perfect for a summer quilt. Plus, who doesn't love giant dots? 


My FMQ is still definitely a work in progress, especially the uniformity of my swirls and stitch length (my Betsy bernina 1008 has no bells or whistles and especially no BSR!). But I love working on my FMQ and knowing I can do it! 


So, when I said this ended up being a truly scrappy quilt, I mean it. Scrappy fabric, scrappy binding, and even scrappy thread! I had a bunch of half full yellow spools and bobbins and I used them all up! For the binding, I used two half full bobbins of different shades of navy. Even the batting is pieced (frankenbatting, anyone?) 

really think this might be my new favorite summer quilt. I think I might need to make at least a couple more and probably some placemats! There are three weeks until the 4th? Plenty of time!

Sunday, May 29, 2016

Sewtopia Virtual Fabric Challenge


A few months ago, I signed up for a virtual fabric challenge sponsored by Sewtopia and Hoffman Fabrics. It featured 6 zebra me + you indah batiks. 
 Photo from gosewtopia.com

I've never worked with batiks, but these prints were so gorgeous and soft. I knew I wanted to make something I'd use and that would show off these stunning fabrics. Enter the Anna Graham (@noodlehead531) gingham tote. 


Last November, I attended sewtopia in Portland and brought home some me+ you mini charms in my bag of swag. I pulled those out and an idea was born!

 Photo cred: Kelly Bowser (@kelbysews)

I decided to make Quilt As You Go panels for my bag, using 4 of the fat quarters and my mini charms. The other two fat quarters were going to be the handles and the inside lining. 


Zippers! Why are zippers so hard to choose?

But once the panels were put together, the rest was easy. 
Inside the bag. I adapted the inside ones because I didn't have enough fabric for large pockets, so I just added a small cell phone pocket. The beauty of this bag is that there are three pockets in front and lots of space for everything inside the bag. 


I loved challenging myself with this project and stepping way outside my comfort zone with fabric, patterns, making a bag (!), and experimenting with quilt as you go and adapting a pattern to fit what I've got on hand. 

And I think I found my new summer purse! 

Monday, May 16, 2016

Color Square Swap Summer!


Welcome to the last round of Color Square Swap! Our summer edition is a chance to swap basic blender fabrics in Red, Navy, and Aqua! Make sure you are capable of abiding by all guidelines before signing up. I've included some examples of fabrics that would work for this swap.  Here's the link to sign up. Feel free to spread the word!

Swap Requirements:

 1. You must have a PUBLIC Instagram account for the duration of the swap to participate.

 2. Choose a basic blender fabric in 100% quilting quality cotton (it may have minimal amounts of other colors, but it should read solid. See below for examples). 

 3. Post your fabric choice to the applicable hashtag (#REDsquareswap2, #NAVYsquareswap2, or #AQUAsquareswap2) and #colorsquareswap. I will comment on your post. DO NOT PURCHASE FABRIC UNTIL I HAVE APPROVED YOUR FABRIC CHOICE. Your fabric choices must be posted to the hashtag by MAY 31st. 

 4. Purchase 3 yards of each color and cut fabric into 40 10" squares.  

 5. Ship fabric to Briawna Hugh no later than June 10th. Fabric received after June 14th will not be sorted and will be returned to sender.

 6. Pay for return shipping. Return shipping is $10 per person (I'm factoring in time to organize and sort fabric, cost of shipping labels, and postage into this shipping fee). Participants will not be able to split shipping costs this round, because I can only fit 3 layer cakes in a Flat Rate Envelope. Shipping costs must be paid by MAY 31st in order to participate. Send your shipping fee via PAYPAL "friends and family" to briawna.hugh@gmail.com

You will receive your layer cake(s) back by June 25th. Once the swap is full, I'll send out a welcome email with my shipping address.  

**FABRIC SPONSOR ALERT! Quilter's Square has offered 25% off yardage purchased for this swap. I will include the discount code with your confirmation email. Make sure you check out their website (quilterssquareky.com) and Instagram account (@quilterssquare) for some serious eye candy!


Red: feel free to use any shade from burgundy to a true Cardinal red. Patterns should be minimal and either tone on tone or a little white. Patterns should be on a small repeat. A good rule of thumb is that the pattern should repeat every 3-5".
Navy: colors can range from Royal to true navy. Again, make sure patterns are minimal.
Aqua: Aqua has a little more variety to it. Anything from turquoise to a dark mint will work for the swap. Make sure patterns are minimal.

Cutting Tips: 

This is how I cut my 3 yards of fabric. I usually end up with a 10-12"  leftover. 


First I fold the fabric in half, leaving the fold in place. When I cut, I'm cutting through four layers of fabric. I square up my edge and cut 5 10"x WOF strips. Because my fabric is folded, I'm actually cut 10 10" strips.


From each strip set, I cut off the selvage first.


Then I measure down 10" and cut a square. Repeat again for a second 10" square. From each strip, I can get 4 10" squares. So, 10 strips = 40 10" squares. Please cut carefully and accurately. Inaccurate cuts will be returned.

I can't wait to see your beautiful fabric! 

Briawna


Tuesday, April 5, 2016

Half Square Triangles (aka, HST)!

This quick tutorial is primarily for my beginning sewing students, but it's a basic reference for a quick method of making two half square triangles (HST). 

I'm a visual person, so I hope the photos help. If not, I'll do my best to describe what I'm doing in each step. 

1. Cut (60) 5" or 7" squares from each of your two fabrics. 5" squares will yield a baby quilt and 7" will yield a large throw quilt. 


2. On the WRONG SIDE of the lighter fabric draw a diagonal line on all 60 squares (On my squares, I drew on the gray fabric). 


3. Pair up your fabrics and put them right side together. For my quilt, I paired a yellow/green with the gray. Line up your diagonal line with the edge of your pressed foot and sew a 1/4" seam line down one side. Don't clip the thread between fabric pairs (this is called chain piecing and it makes quilting so much faster). You should end up with a long chain of squares with one diagonal seam. 


4. Take your squares out of the machine and flip them around, so you can sew a 1/4" seam on the other side. If you look at the squares in the photo, you'll see two seams on the same pair of squares. 


5. Clip the thread between the pairs of squares and you should end up with 60 sewn pairs that look like this. 


6. Before you cut your fabric, make sure you've sewn your blocks correctly (see step 7 for what your blocks should lookn like). Using your rotary cutter and ruler or a pair of fabric scissors, cut along your drawn line. You should end up with 120 triangle blocks. 

7.  When you open up your triangles, it should look like this. Press your squares towards the darker fabric. If your fabrics are similar value, pick one fabric and press all the squares the same way. 


You're ready for our next class. I can't wait to see your squares! 

Monday, February 8, 2016

Color Square Swap...Spring Edition!


Are you ready for another round of color square swap? This round we're tackling three colors-orange, pink, and yellow! If you missed the sign up on my Instagram, you can sign up here.

 I'm posting some examples of basic blender fabrics below, but essentially just do the squint test. If you squint when you look at the fabric and it reads a specific color, that's a blender fabric. I'm also posting how I cut my 3 yards of fabric to get 40 10" squares. If you need the rules again, they're listed at the bottom below all the instructions. I can't wait to see what fabric you pick!

COLOR GUIDELINES

Oranges: (#orangesquareswap
anything ranging from peach to dark orange is fine. Just make sure it reads orange and not pink or red. 

Pink: (#pinksquareswap)
anything from pale pink to raspberry works as a basic. Just make sure it doesn't read red or purple

Yellow: (#yellowsquareswap)
you can use any shade of yellow from light yellow to mustard. Avoid colors that are too close to lime (like citron) or too close to brown or tan. 


CUTTING TIP:

When I cut my fabric, I double it up on my cutting mat and line it up with the bottom line, with the fold on the line and the selvage at the top. I cut five 10"xWOF (width of fabric) strips. From each fabric strip. From each strip, I can get 8 10" squares. Make sure you cut off the selvages before cutting your 10" squares. 

Squares that are cut too small or not square will be returned. Please cut carefully!


THE RULES:
1. You must have a PUBLIC Instagram account for the duration of the swap to participate.

2. Choose a basic blender fabric in 100% quilting quality cotton. It may have minimal amounts of other colors, but it should read solid.  

 3. Post your fabric choice to the applicable hashtag (#orangesquareswap, #pinksquareswap, or #yellowsquareswap2).I will comment on your post. DO NOT PURCHASE FABRIC UNTIL I HAVE APPROVED YOUR FABRIC CHOICE.

 4. Purchase 3 yards and cut fabric into 40 10" squares.

 5. Ship fabric to Briawna Hugh no later than March 15th. Fabric received after March 18th will not be sorted and will be returned to sender.

 6. Pay for return shipping. **Updated shipping costs: Return shipping is $10 per person (I'm factoring in time to organize and sort fabric, shipping labels, and postage into this shipping fee). I will not be combining shipping for participants this round, because I can only fit 3 layer cakes in a Flat Rate Envelope. Shipping costs must be paid by FEBRUARY 28th in order to participate. Send your shipping fee via "friends and family" to briawna.hugh@gmail.com

You will receive your layer cake(s) back by March 30th. Once the swap is full, I'll send out a welcome email with my shipping address.  

Thanks, 

Briawna
@purplepoppyquilts


Friday, January 29, 2016

February do.good stitches blocks

So, it's my turn to host the wonderful do.good stitches nurture circle. We've done several complex and intricate blocks in the last six months, so I thought I'd go basic. I made all 4 blocks in just under an hour. 

This month's block is a basic 16-patch, measuring 8.5" unfinished. I'm asking for two warm blocks and two cool blocks. Each block is made up of 16- 2.5" squares in a rough gradient of warm or cool colors. You can mix solids and prints, as long as the prints read a single color. We're sticking with the basic ROYGBIV, but you can mix in some red-orange, lime green, Aqua, etc. if it works with your gradient. I'd like seams pressed open, so it might help to make your stitch length a little smaller than your usual piecing stitch length. Feel free to email me if you have questions. Happy sewing! 


Tuesday, August 4, 2015

do.good stitches August

It's my month as Queen Bee for my do.good stitches Nurture circle. 

I've always wanted to make a red & white quilt, so this month is the time for it! I'm going for a sampler style quilt with star blocks. All background fabric needs to be solid white (Kona White, Bella 097, etc.). I'm not picky, as long as it's quilting quality and true white. I'm fine with any solid or tone on tone red.

Because it's a sampler style, any star blocks will do-they just need to be 12.5" unfinished. Please make two different stars. I've included several sample star block patterns here, but feel free to use any star block.

My blocks:

Ohio star


Double star 

Here are a few star blocks you're welcome to use. Or feel free to find your own, as long as they end up 12.5" unfinished and have a white background! 

Happy star making!

Briawna 

JUNE Cross Plus Charity Spotlight & Block Construction

UPDATE: This month we raised $557 for RAICES Texas. Our quilt winner is Linda Costello!! It's June. Yes, I skipped May. It was a non-s...